

How I Made My Life Easier By Using A Synthesis Matrix
By Abbie, a Writing Center Coach
I’ve always enjoyed writing and thought myself quite good at it before getting to college. Of course, a lot of the writing you do then is for English class, reading one book and writing about it; you still have to work at figuring out your focus and how to support it, but the “research” aspect is limited. Stepping outside of a traditional English paper is another step, one that I was hit with when I first started college and had to write for other subjects.
To me, a research paper is one of the most daunting assignments I’ve ever received. Suddenly, I needed to look at more than just a single work of fiction. There are often semester-long steps to picking a question, finding sources, evaluating them, and synthesizing them. It’s easy for me to want to push those tasks until later or cherrypick evidence to support an easier answer. But that doesn’t result in the best research paper possible, and I might not even learn much along the way.
One of my favorite strategies for writing research papers is creating a synthesis matrix, which is essentially creating a research worksheet to fill out. They can look different depending on what I’m working on, but their main purpose is for taking research notes and seeing relationships across large numbers of sources and information categories. I’ve used both Microsoft Excel and Google Sheets to create synthesis matrices in the past.
The first time I ever created a synthesis matrix was for ENGL 402, which I took to apply to work at the Writing Center. The assignment was a literature review where I had to pick any topic related to writing and explore what the literature said about it. I had no idea where to start, but this method helped me land on and deeply explore my topic.
While working on my literature review, I divided my synthesis matrix process into five steps: topic selection, source selection, matrix setup, reading and categorization, and usage of the matrix itself.
Step 1: Topic Selection
First, I decided to freewrite some topic ideas, a strategy I got from the Writing Center’s Brainstorming handout. I set a timer for 5 minutes and listed out every topic related to writing that came to mind. I came up with multiple ideas, but the one I chose was about writing motivation. As someone who has always loved writing, I wanted to explore people writing solely for a grade rather than because of genuine passion and interest in the topic. This helped me come up with keywords (writing, grades, motivation, rubrics) that I could then use in my initial research step when searching for sources.
Step 2: Source Selection
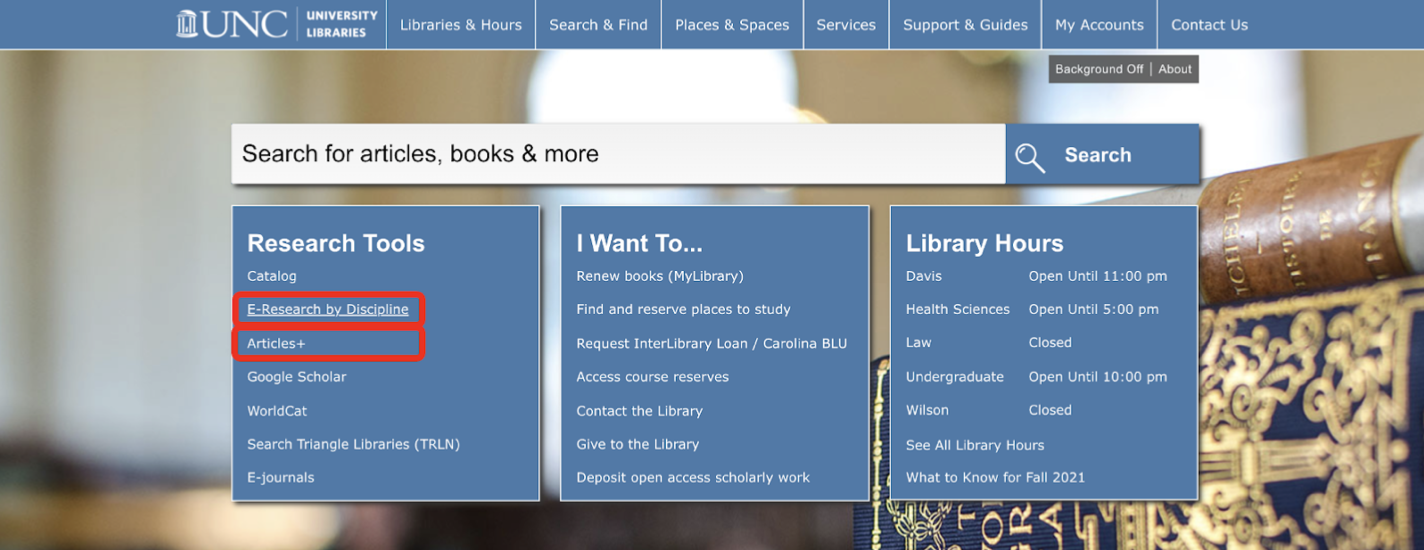
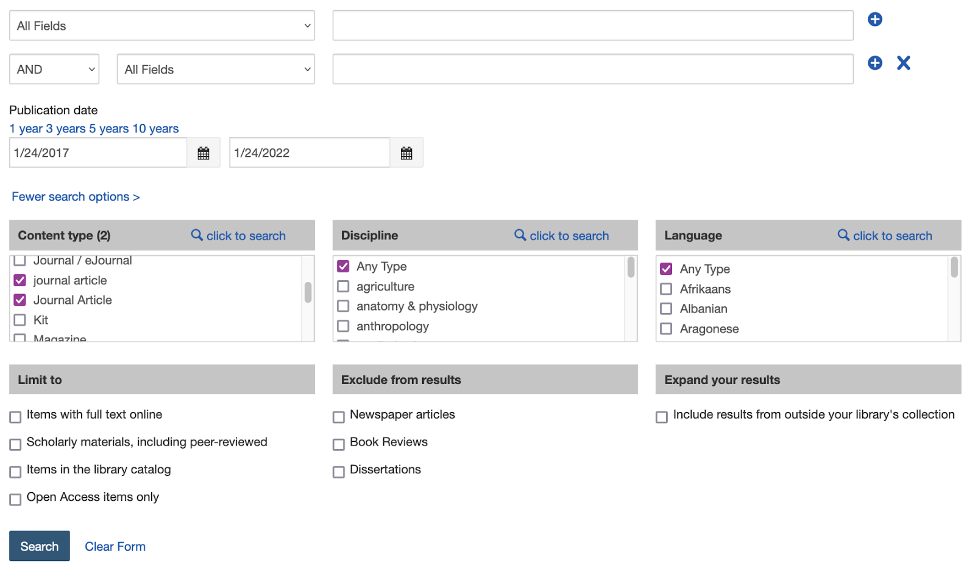
Once I had my keywords, I turned to the UNC Libraries website. I always begin with the “E-Research by Discipline” tool, which allows me to select databases of academic articles that are more likely to be related to my topic. For my initial ideas about writing motivation, I went to a database under the “English” discipline. The “Articles+” on the library site has more search filters under “Advanced Search” that I used to get more specific search results.
Through this research process, I landed on a topic: utility-value in writing. Using this topic to form my new keywords, I found multiple sources related to writing, learning, real world applications of course material, and connections between class content. One issue I ran into was that a lot of sources were about multilingual learners, while I just wanted to focus on general college writing (rather than language learning). Thankfully, I was able to use Boolean search logic to filter out language learning sources.
Step 3: Setting up the Matrices
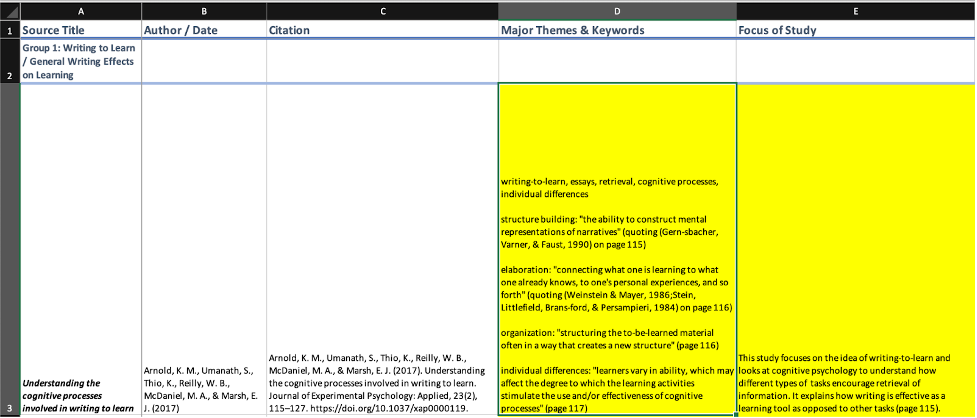
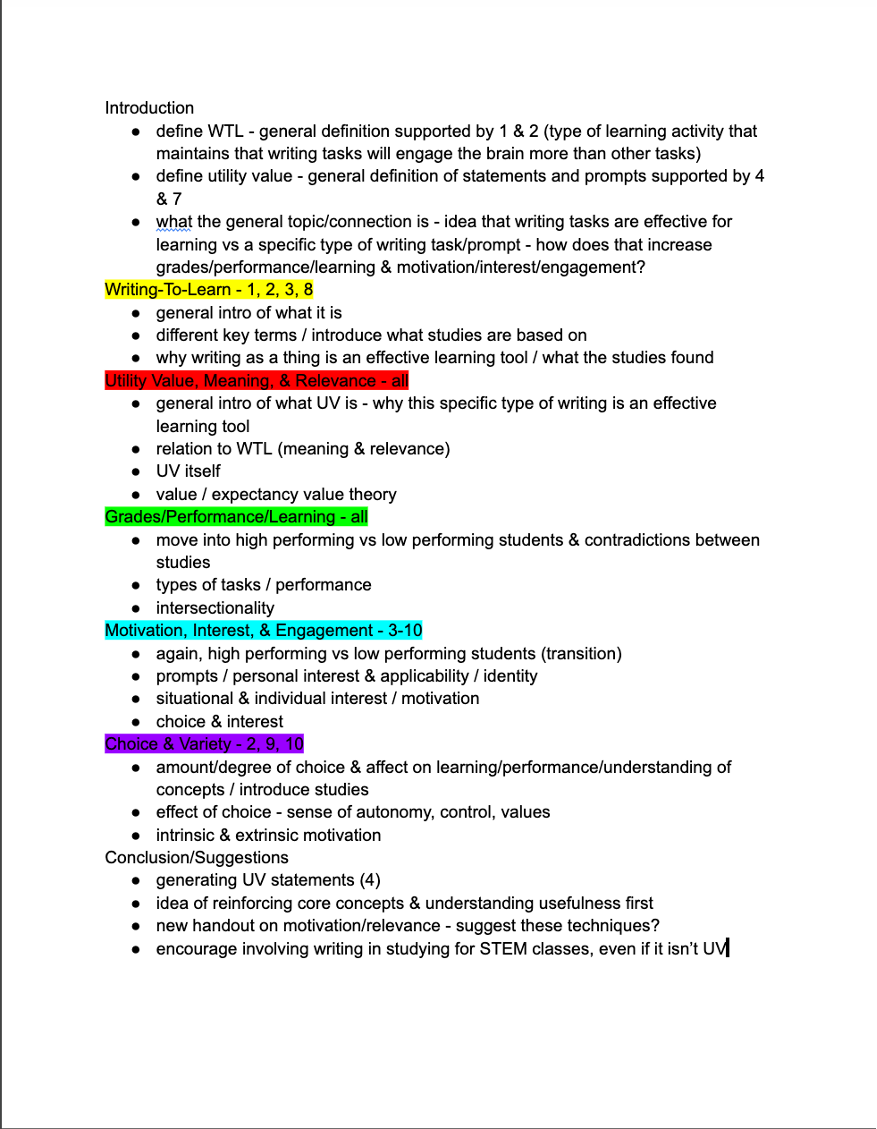
Before looking through the sources I had gathered, I set up a Microsoft Excel sheet for note taking. This would become my synthesis matrix — all of my sources, along with the author, date, and citation, were listed in the left columns. The rest of the columns were broken into categories of information I thought I might use. The first few columns make it easy for me to find important information needed for parenthetical citations and references, as well as to remember the specific focus of a source. I was mostly using empirical studies, though other source types could have different categories, like a synopsis of a book from which a chapter had been pulled. I ended up with two separate sections of my sheet: one for sources related to utility value writing and another for sources related to Writing-To-Learn (a learning pedagogy with some similarities).
With my matrix set up, I felt much better about my ability to take good notes on my sources rather than trying to tackle them with a blank document.
Step 4: Reading & Note-taking
Once I started reading, using the matrix felt like I had given myself a checklist of sources to get through along with boxes to fill in for each one. Because of this, I was able to get through my sources much more quickly, feeling a sense of accomplishment as I could see how much I had done. I also was already beginning to organize my notes because of the matrix setup. It initially seemed like a much more time-consuming method, but the organizational element was a huge time-saver when it came to actually putting my paper together. I was much more familiar with my evidence by the time it came to outline, so I didn’t have to dig through my notes as much to figure out what to say or where to say it.
As I read through my sources, I took notes in the matrix by copy and pasting quotes from my sources as well as paraphrasing information. I always made sure to add page numbers so I could easily go back and find where I got my information. Along the way, my categories molded to what I was reading. It was important for me to not only search for what I was originally looking for but reflect what was actually being discussed in my sources.
Step 5: Using the Matrix
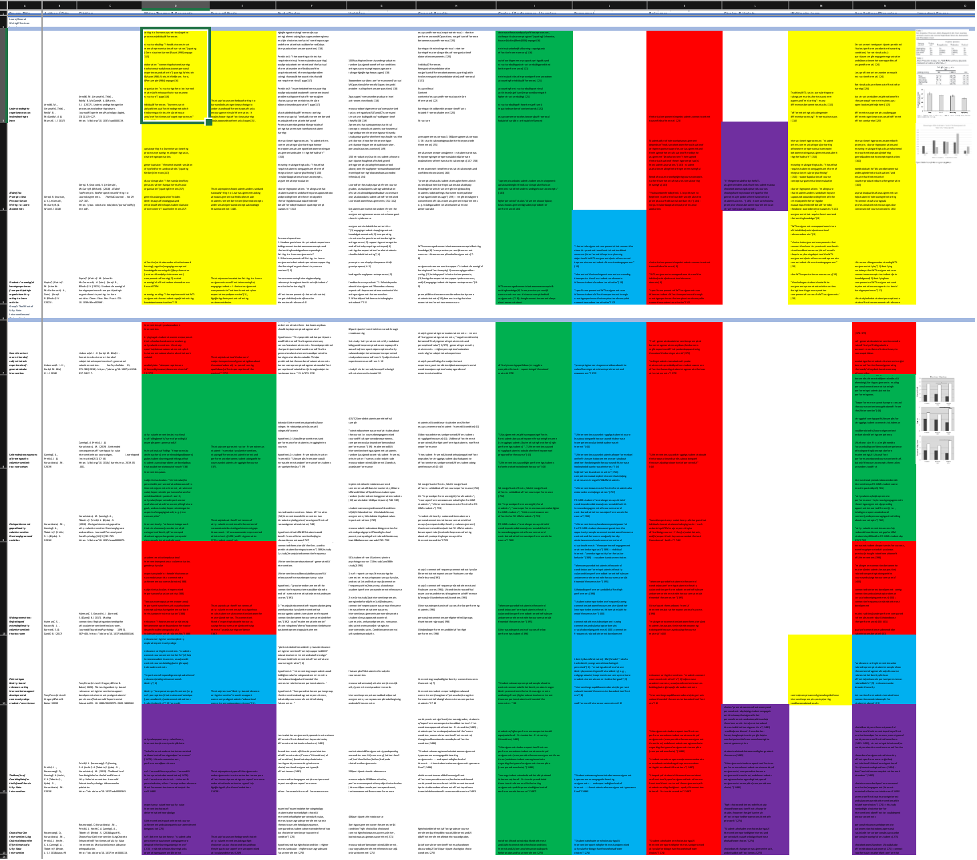
Once I had filled in the entire Excel sheet, I could see which sources overlapped where, compare and contrast what they said, and see areas of agreement and disagreement. My next step was to use this information to organize my paper. I decided to color-code the boxes based on where I thought they might fit; while this ended up largely following the column categories, there were a few that fit somewhere else, and the visual strategy helped remind me to include everything where I wanted it.
The last step was writing the actual paper. I found it to be a much easier and faster process with my synthesis matrix having already organized everything, and was able to sit down and write an entire 10 pages over just a couple days. I ended up satisfied with what I had written, and I know it would have been much harder without the synthesis matrix.
Reflections
If I were to go back and work on this matrix again, I might work on paraphrasing more than just pasting direct quotes in. While it was easier to just paste the original wording, I ended up having to work a lot on paraphrasing and evaluating my sources’ information when I was actually writing the paper. I think using more paraphrasing relative to quoting when I was filling in the matrix would have gotten me to try to better understand what I was reading when I was reading it, and probably would have saved some space since I ended up with a lot of blocks of long quotes. I also had a column for figures and diagrams that I didn’t fill in much and didn’t end up using what I had filled in at all, so I might reevaluate what forms of information I’m predominantly paying attention to in sources and whether other forms might add something of value to my paper, perhaps by listing out information I get without even looking at the main text.
I highly recommend trying this strategy out on your next research paper or literature review! I learned it from Dr. Gigi Taylor in ENGL 402, a class where you can try using this strategy and learn more about yourself and your writing style. I am very grateful to have found a method that works so well with my approach to writing, and I hope that it helps you as well.
This blog showcases the perspectives of UNC Chapel Hill community members learning and writing online. If you want to talk to a Writing and Learning Center coach about implementing strategies described in the blog, make an appointment with a writing coach, a peer tutor, or an academic coach today. Have an idea for a blog post about how you are learning and writing remotely? Contact us here.