
 Proofreading with Control-F
By Sam, a Writing Center Coach
In bygone days, I worked as a freelance Academic Writing Coach and Editor at a company that provides editing assistance for dissertations and other forms of scholarly communication. They trained me in some very effective and efficient processes for reviewing academic writing that changed the way I proofread my own work. For example, I learned how to harness the power of Control+F (or Command+F for fellow Mac users), and it’s a power available at our collective fingertips.
Before sampling that source of power, however, we need to consider another valuable lesson from my time as a freelance editor: the segmentation of proofreading. By this, I mean breaking up the editing process into subphases focused on different editing goals. Let’s say, for example, I need to proofread a 10-page final paper for one of my library science courses. First, I have to decide how clean the final draft needs to be for my own satisfaction (and/or based on assignment guidelines), and how much time I can/would like to spend on the revisions. In this case, I’d like to feel pretty darn confident that the paper is pretty darn clean, so I make plans to complete a surface-level review and a citation/reference cross check before a final line-by-line read through.
Now we can tap into the well of arcane mystery that is Control+F. For the unindoctrinated, Control+F is a keyboard shortcut to the “Find” tool in most word processors and internet browsers. The Find tool allows you to search a document or page for a string of characters (whether that be multiple words, parts of a word, punctuation, or some combination), and then will highlight each instance in which that string of characters appears.
In the surface-level review stage, I’ll make a list of surface-level errors to Control+F for, and perhaps even find-and-replace. These errors might include: instances of two spaces instead of one, a period or comma after a quotation mark, incorrect use of numerals under 10 instead of written numbers, every use of the word “since” to check that I didn’t use it in place of “because,” and so on, depending on your style guide. Then I let Control+F find the errors for me. If checking flow or word choice, I might search for words I tend to overuse (killing my vocabulary darlings, as it were), or in certain cases, checking words or names in other languages that need non-English denotation.
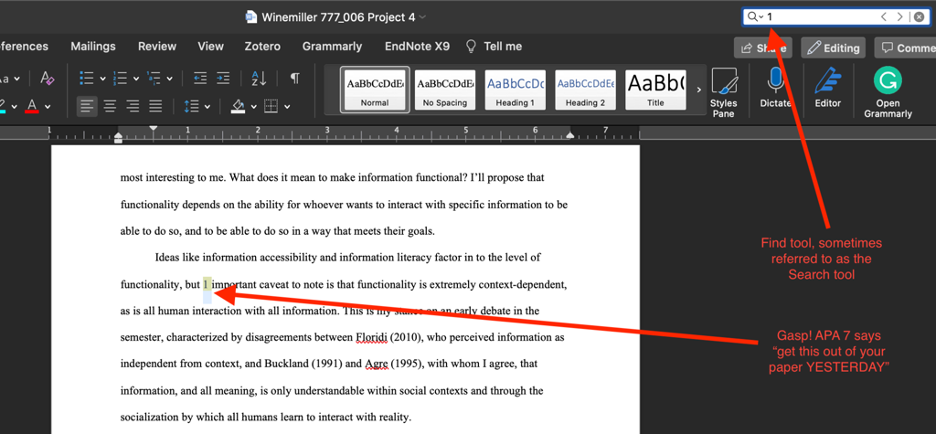
Example of the surface level review process
Far more exhilarating, however, is checking for correspondence between in-text citations and reference list entries. Some say “exhilarating” is a reach, but it’s unassailably reassuring. Starting with the reference list, I’ll Control+F for the last name of the first author of each reference list entry to make sure at least one corresponding in-text citation appears in the paper, and then I’ll click through each of the Control+F results for the author’s last name to make sure that each in-text citation is formatted according to whichever guidelines I’m using. As I go, I add any missing citations or delete any reference list entries that ended up on the cutting room floor. An important part of this process is to use the highlighter tool to mark each in-text citation that has a corresponding entry in the reference list, because, the next step is to do cross-check that each in-text citation has a corresponding reference—the opposite of the initial step. I scroll back to the beginning of the document and Control+F for a single open parenthesis like “(” to search for any in-text citations that are not highlighted, and therefore do not have a corresponding entry in the reference list. Then I either add a reference list entry for the in-text citation, or delete the in-text citation. For this second citation-reference crosscheck step, it’s helpful to copy and paste the reference list into a new document and have both documents open side by side so you can easily determine the presence or absence of corresponding reference list entries for each in-text citation.
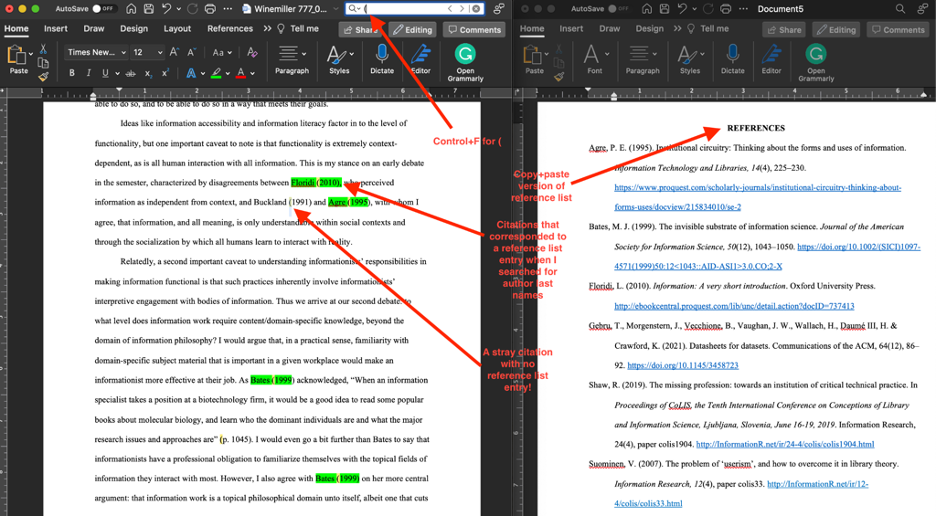
Example of the citation/reference crosscheck process
Although this method doesn’t preclude learning the rules of a given style guide, it’s an efficient way to check a lot of basic boxes so that, by the time you do a line-by-line proofread, you can really focus on sentence-level clarity. It can be hard to proofread through a style lens, an organization lens, and a grammar lens all at the same time, which is why we often ask students to prioritize certain concerns in a Writing Center appointment. When proofreading on your own, making it easy on yourself is a real gift—one I wish I had received earlier in my writing journey.