

How I use Zotero to Organize My Research
By Marcy, a Writing Coach
When I started graduate school, one of the most common pieces of advice I received was to pick a citation management software and stick to it.
It took me four years before I finally followed this advice.
The truth is, I had tried to use Zotero before, but frankly, I didn’t understand the hype. Now, I’ve been using Zotero for a year and a half, and I wish I had started sooner. What made me do such a big 180 on using Zotero? Mostly, discovering that it does so much more than just generate citations. Specifically, there are three main features in Zotero that turned me into a convert: its ability to store all of my research in a singular location, its tagging feature, and its notetaking and integrated PDF software.
Storing my research in a central repository
Before I started using Zotero, whenever I downloaded a new text, I had to create a new folder, download the relevant PDF, and move the PDF to the correct folder. It also created issues when I used a text for different topics. For example, if I originally read a text for my English 666 class, I would store it in my English 666 folder. Afterwards, if I wanted to use it again, I’d have to remember where I’d originally read the text or move it to the appropriate place.
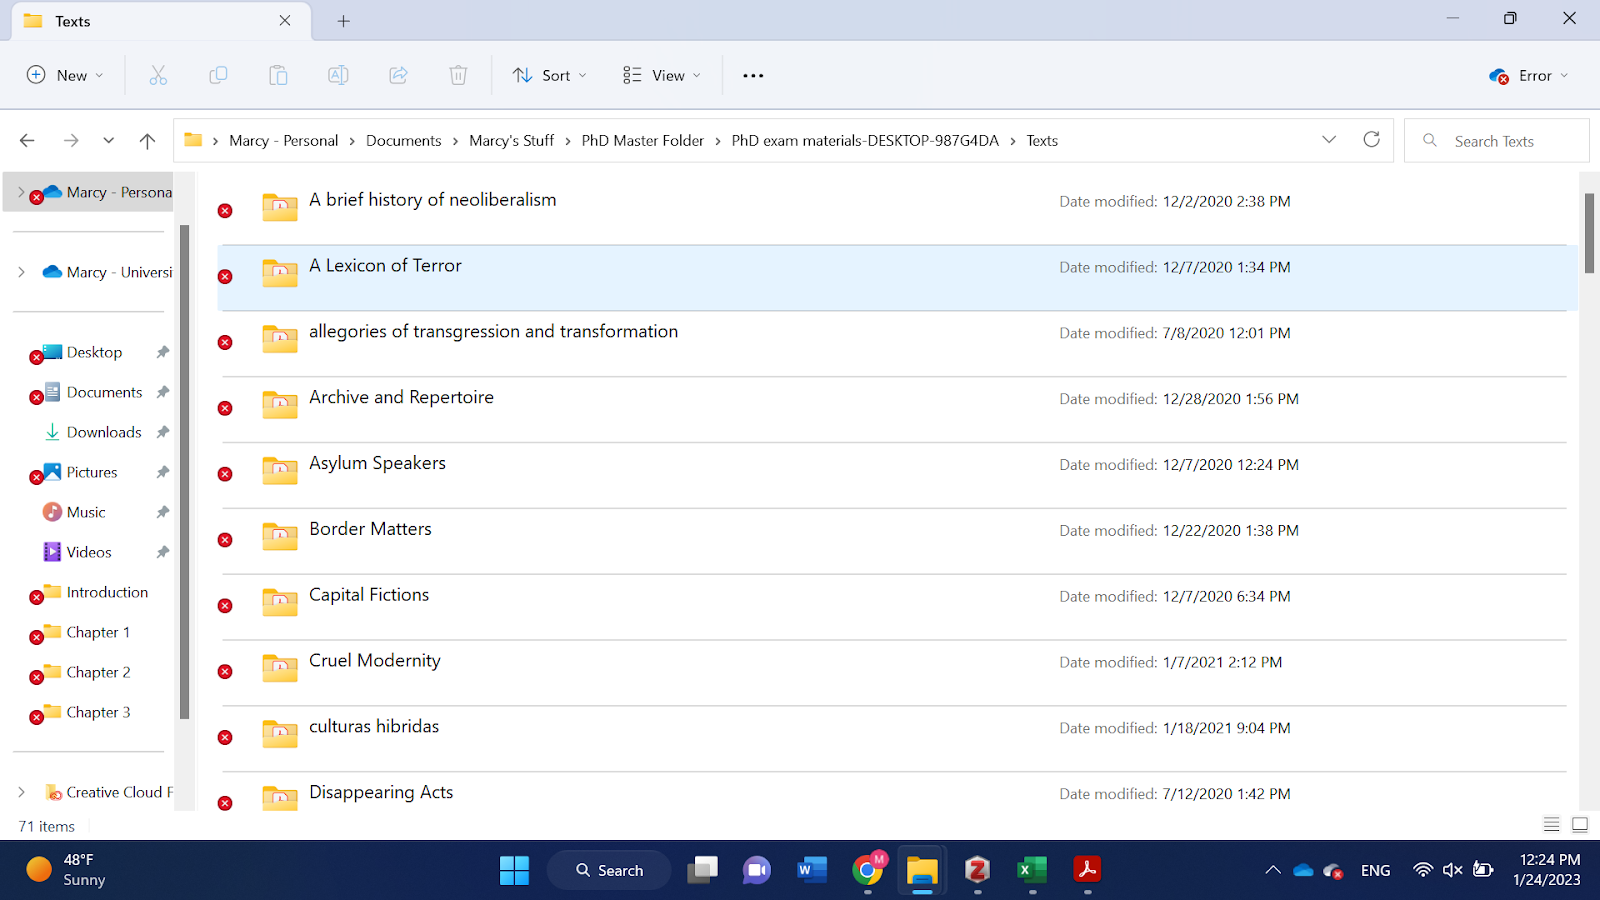
With Zotero, my system is a lot more streamlined. Today, I started working on the section of my dissertation introduction that discusses archives in Latin America. After searching through the UNC libraries, I found a source that looked useful to me, so I used my Firefox Zotero Plugin to download the article I needed directly to Zotero.
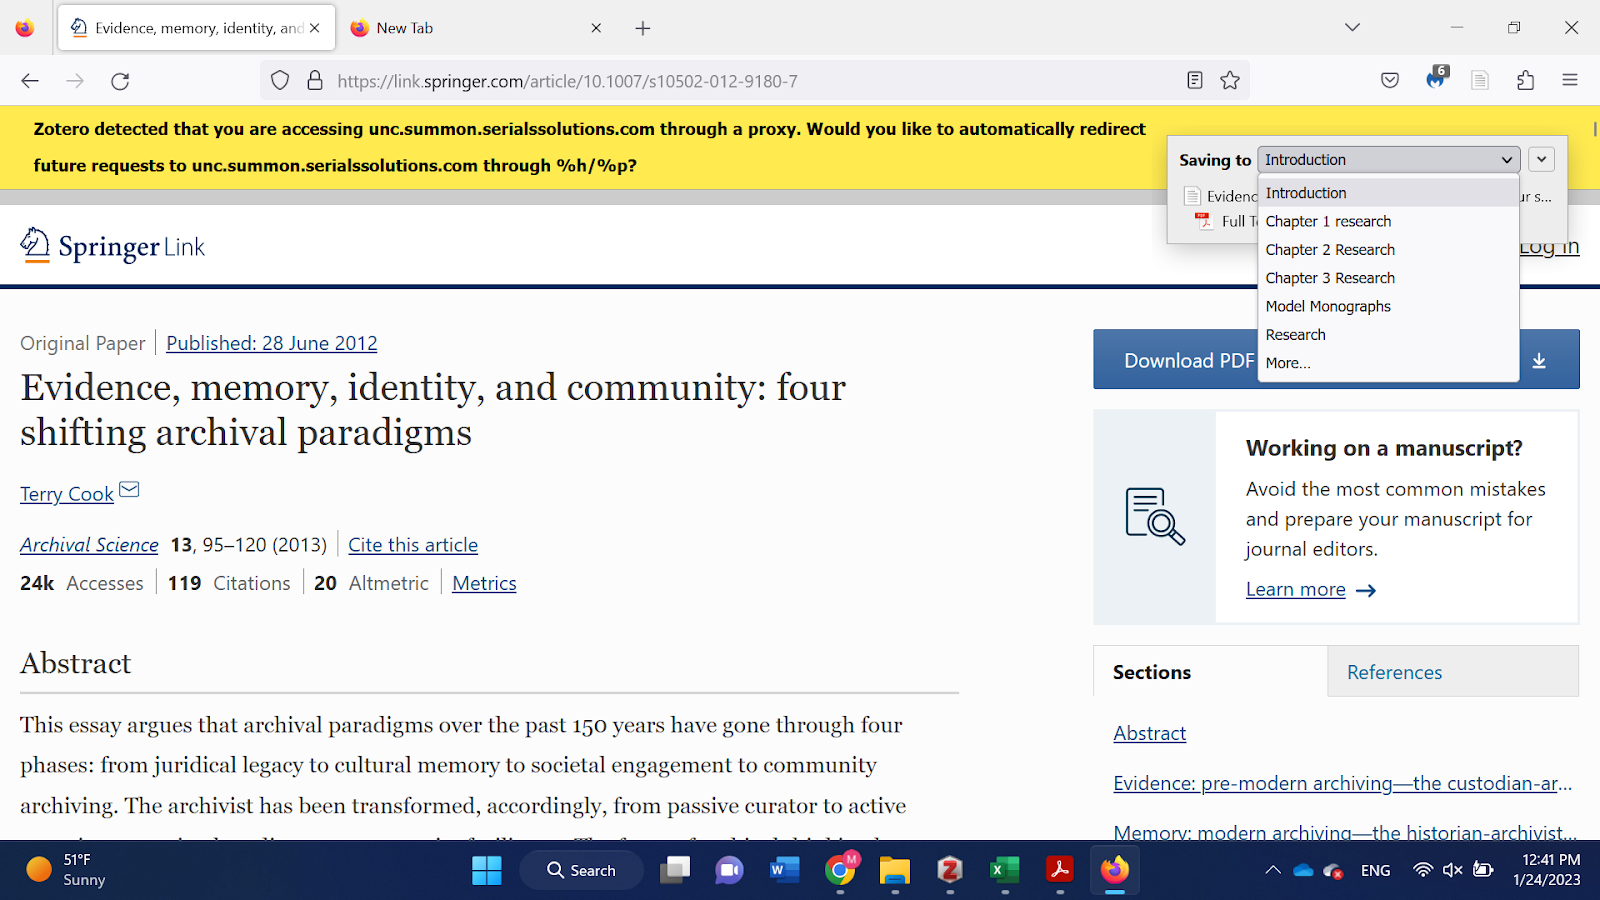
Within Firefox, I can choose which of my Zotero folders I want to save to. Since this article is for my introduction, I selected the “Introduction” option from the dropdown bar.
My newly-downloaded article now appears automatically in my Zotero desktop app, and it also includes all of the bibliographic information I need.
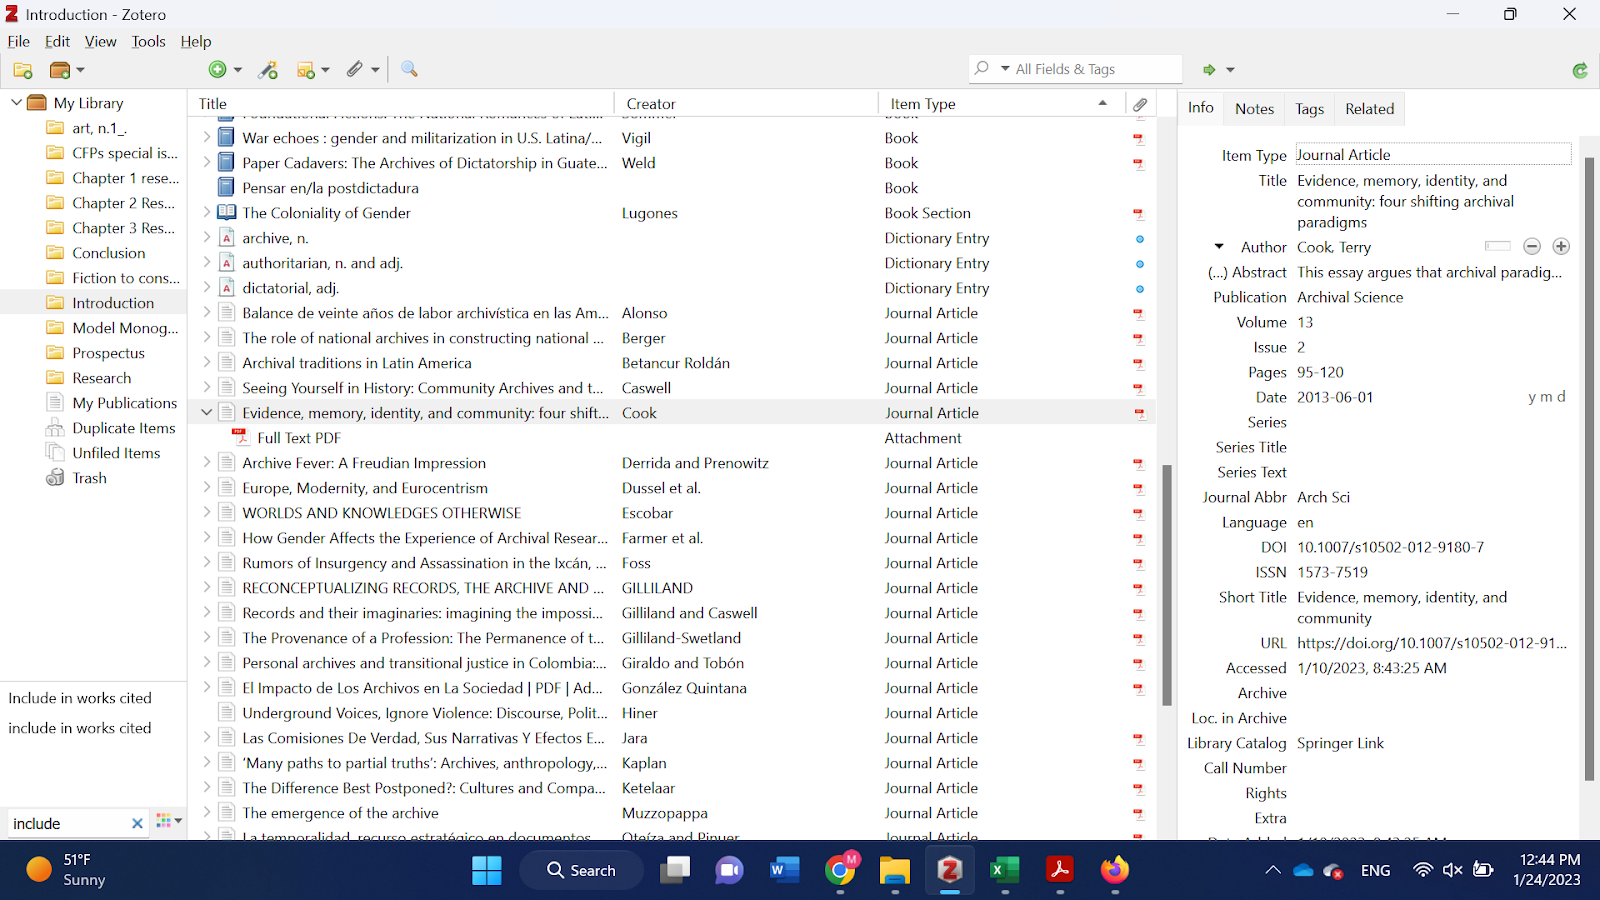
But what happens if I decide to cite the same article later in my fourth dissertation chapter? The good news is, it’s easy to reuse a source and still stay organized.
I haven’t created a folder for my fourth dissertation chapter, so I’ll start there by clicking the “Add collection” button in the top left-hand corner and giving the collection the name “Chapter 4 research.”
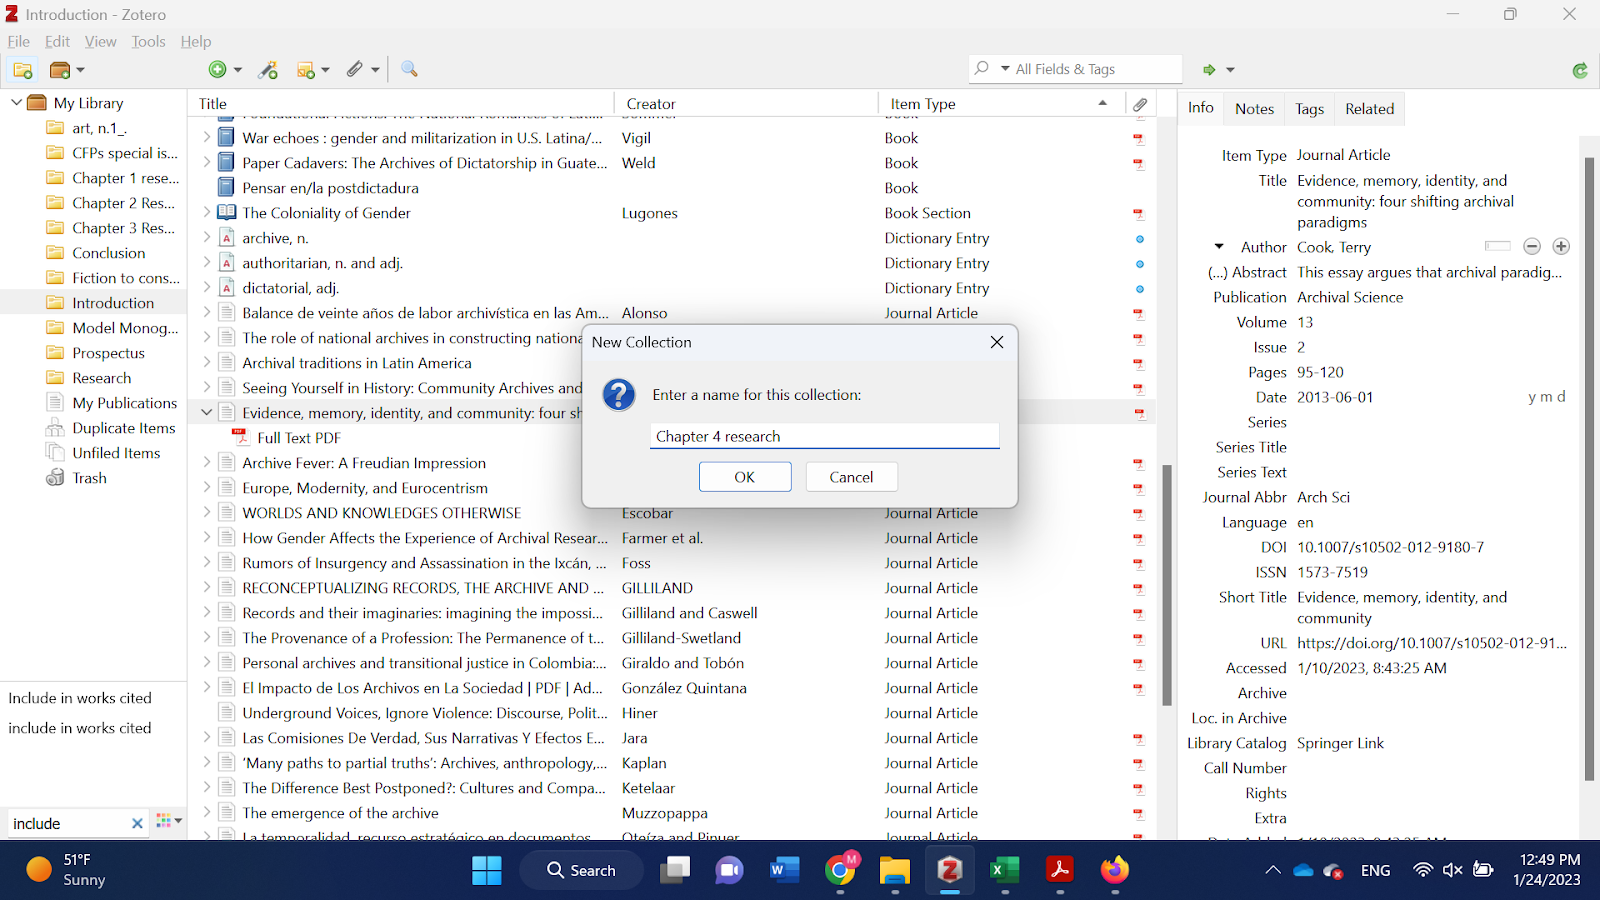
Now that I have my new folder, I can either drag and drop my article into my newly-made “Chapter 4 Research” folder, or I can right-click the source, click “Add to Collection,” and then select “Chapter 4 Research.”

Now, this source appears in both folders (with the PDF), so I can easily access the same source from two different locations.
Tagging
Now that I have all of my sources in the same place, I use Zotero to help me wade through my research. I’m currently writing the introduction to my dissertation, and I already have over 50 sources in Zotero!

To help me stay organized, I like to give each source I download a tag that tells me what subsection of my research it relates to. For example, I know that one of the major sections of my dissertation introduction is about archives, so I tag all of those sources as “archive.”
To create a tag, I click on my source and then click the “tags” tab in the right-hand side of the page. Then, I click “add” and I write whatever word or phrase I want–in this case, archive.
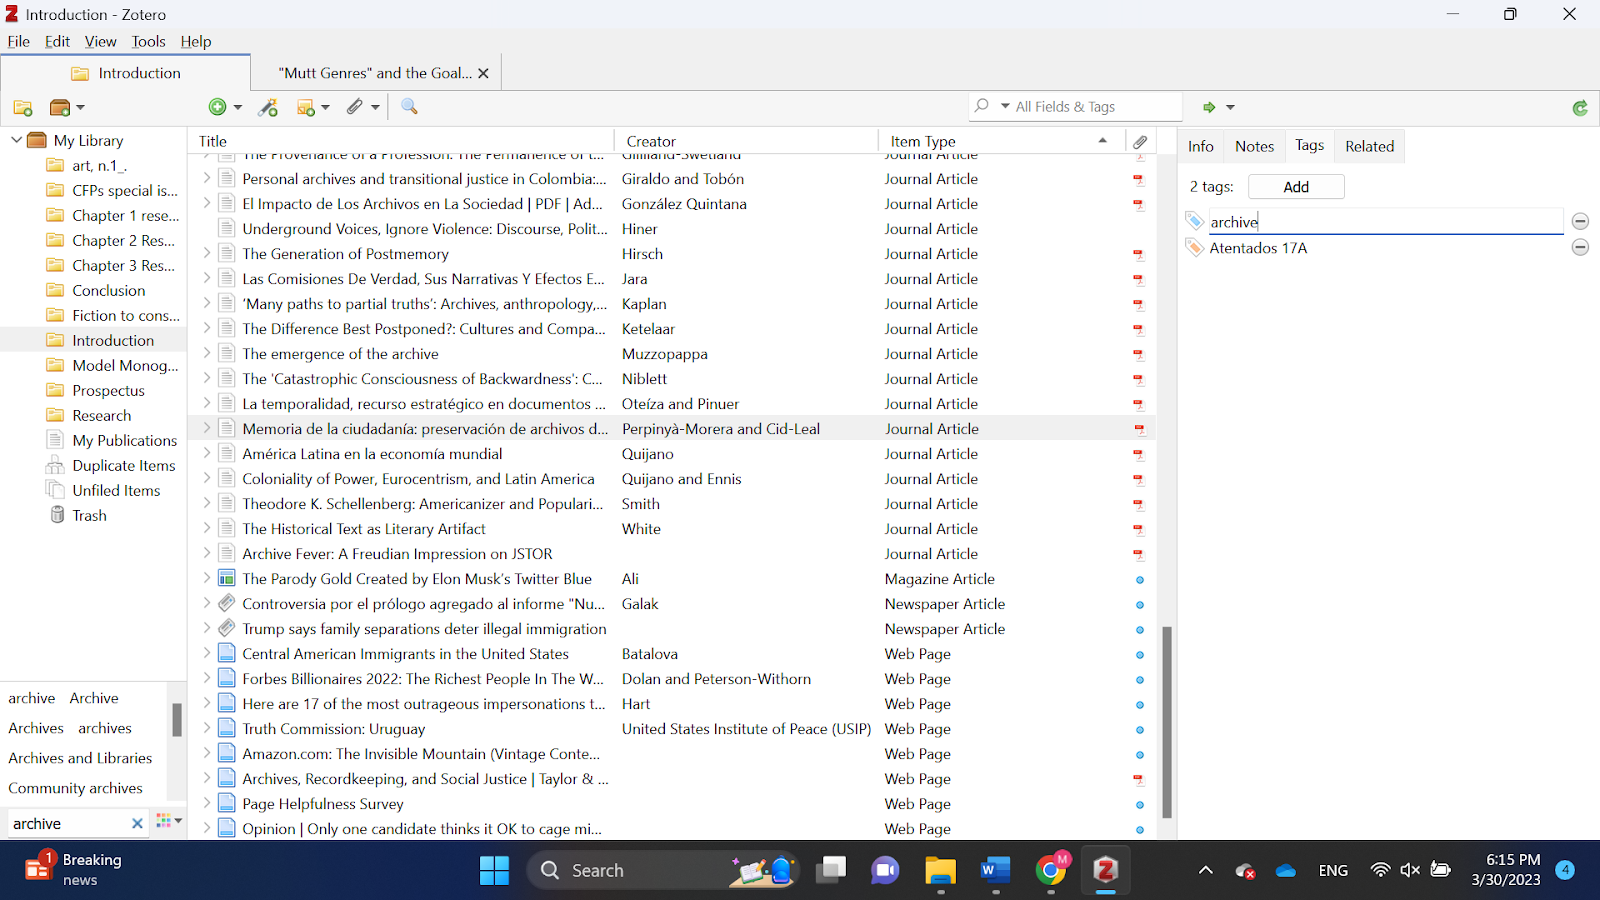
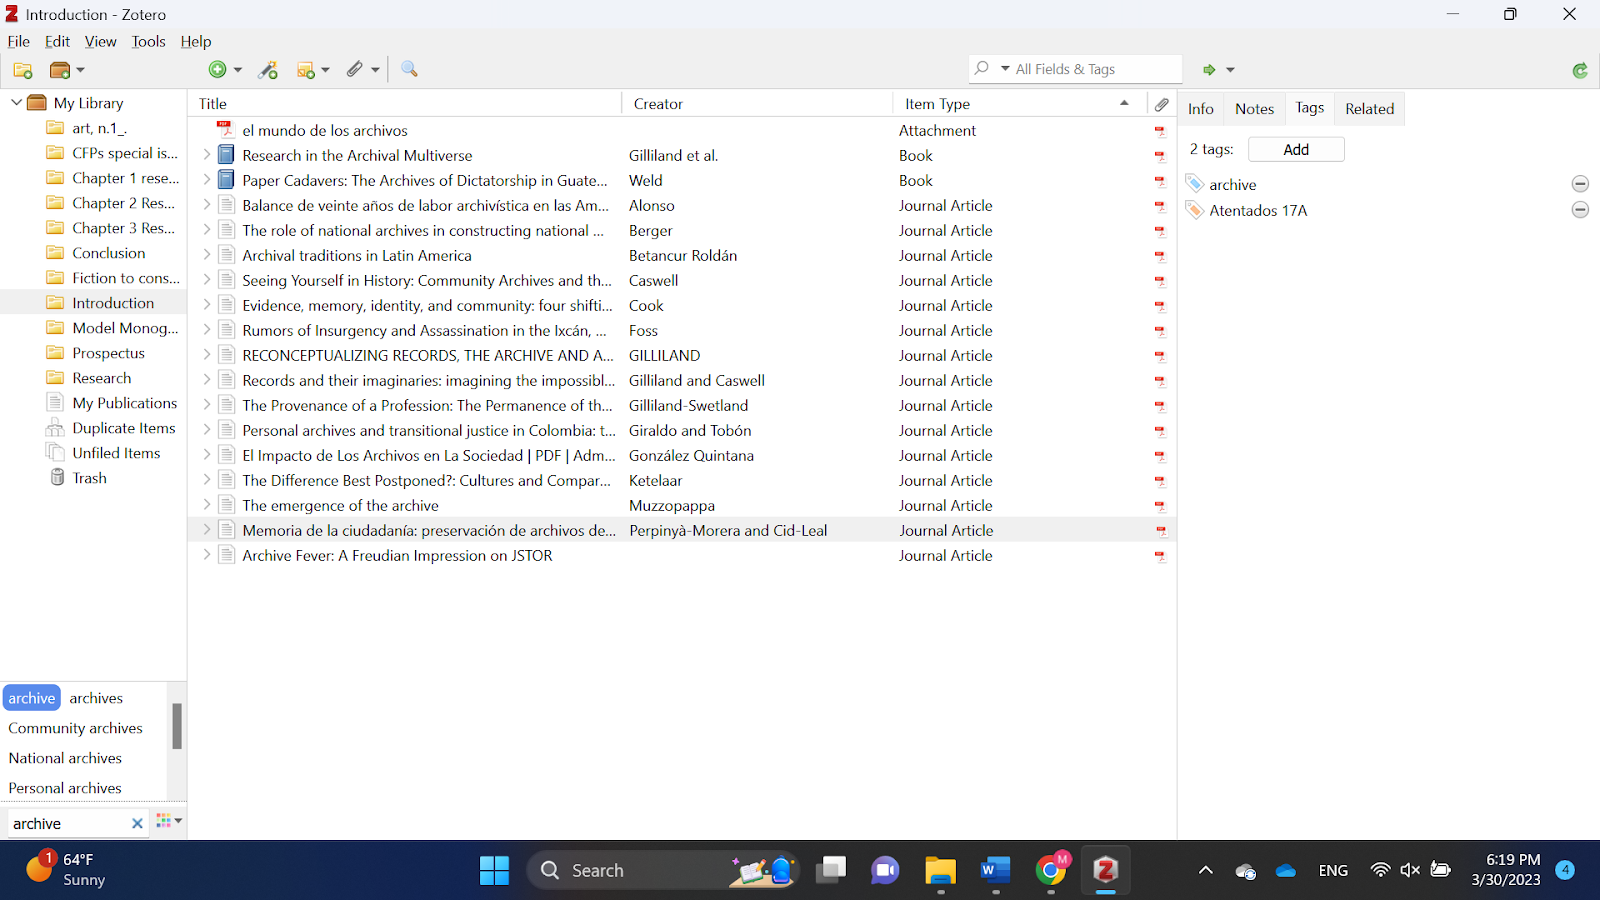
Once I tag my articles, I can easily filter my sources by typing in the tag in the bottom-left corner and selecting the relevant term. Now, instead of having to wade through 50+ sources, I have around 10 sources.
I also use tags to help me remember which articles I need to include in my Works Cited. While I’ve downloaded every article that might be of interest to me, I won’t end up using all of them in my Introduction. So, whenever I use a source for the first time in my writing, I go back to Zotero and add the tag “include in works cited.” I’ll even use tags to help me filter through which articles I’ve already read and which articles I still need to read!
Note-taking
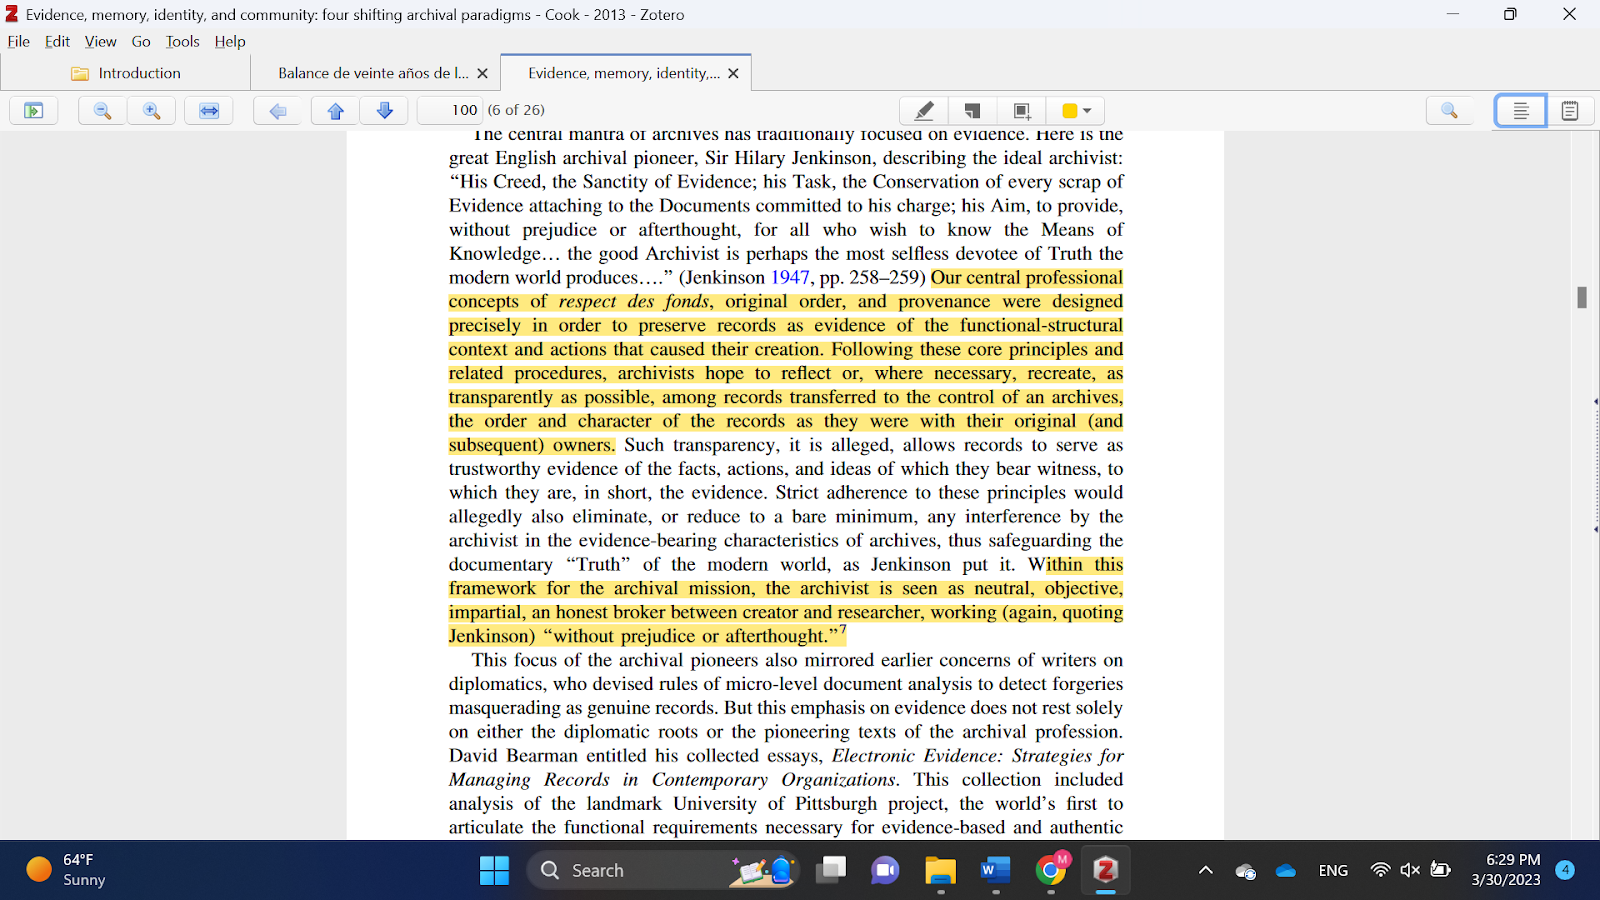
Once I’ve tagged my sources, I’m ready to start reading and taking notes on my source. To read my source, all I need to do is double click on the source and the PDF appears in a new window in Zotero.

Within Zotero’s PDF editor, I take notes by highlighting and adding sticky notes in the PDF. To highlight or add a sticky note, I just use the bar at the top of the PDF.
While I can take notes within the PDF by adding a sticky note, I can also add notes that appear in the main window. When writing my Introduction, I’ve mostly relied on my PDF annotations and I haven’t taken as many notes. However, for my second chapter, I used the notes feature extensively, typically writing brief summaries and to record my reaction to a source.
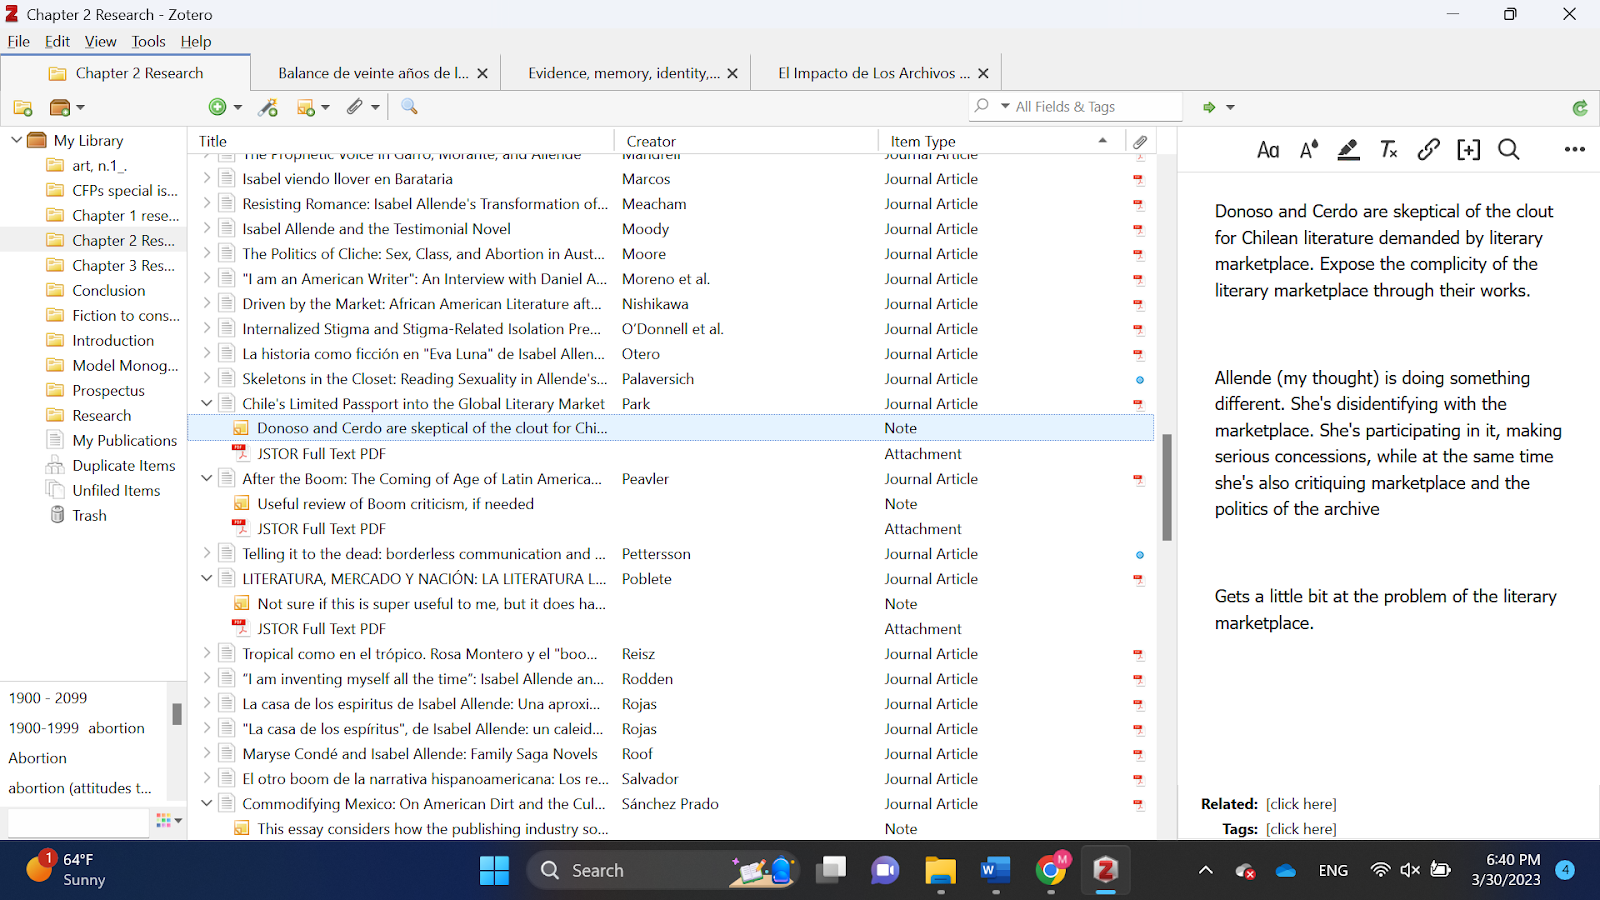
What I like about keeping notes this way is that it shows up in the main interface of Zotero. So I can quickly click on different sources to read my notes and jog my memory. This comes in handy when I’m writing and I remember an argument that I’ve read, but I can’t remember which source made the argument. Rather than opening 50 PDFs manually, I use the tags to narrow my search down to a subset of articles. Once I’ve narrowed it down, I can quickly browse through my notes without ever having to leave Zotero’s main screen.
Zotero has been a lifesaver by helping me work more efficiently and strategically. Now, all that’s left for me to do is actually write my introduction…